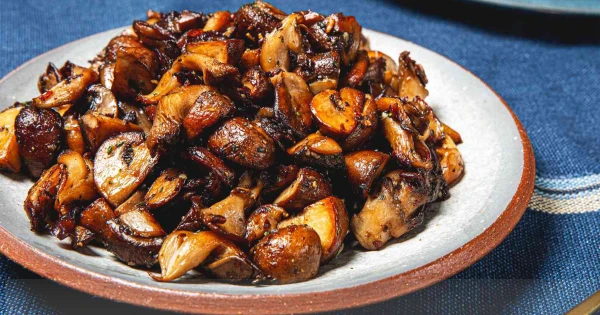
Sautéed mushrooms are a kitchen staple that can elevate everything from steaks and pastas to omelets and grain bowls. Yet many home cooks find themselves with limp, watery, or unevenly cooked results. The good news is that mastering the art of sautéing mushrooms requires only a few simple techniques. With the right heat, fat, and timing, ordinary mushrooms transform into golden, deeply flavorful morsels. This guide breaks down the step-by-step process for achieving professional-quality sautéed mushrooms in your own kitchen.
The first step to success begins at the grocery store. Choosing the right mushroom variety can influence both texture and flavor. White button mushrooms are mild and readily available, while cremini, also known as baby bellas, offer a richer, earthier taste. Portobello caps provide a meaty texture ideal for hearty dishes, and shiitake mushrooms bring a savory, smoky note. For the best results, select mushrooms that are firm, dry, and free of dark spots or wrinkles. Freshness is key, as older mushrooms tend to release more water during cooking.
Proper cleaning is another critical factor that many cooks overlook. Mushrooms are porous and act like sponges, quickly absorbing liquid. Submerging them in water or running them directly under a faucet can lead to excess moisture, which hinders browning. Instead, gently wipe the caps with a damp paper towel or use a soft mushroom brush to remove any dirt. If rinsing is absolutely necessary, do so quickly and pat them dry immediately with a clean kitchen towel. Dry mushrooms are essential for achieving that coveted golden-brown crust.

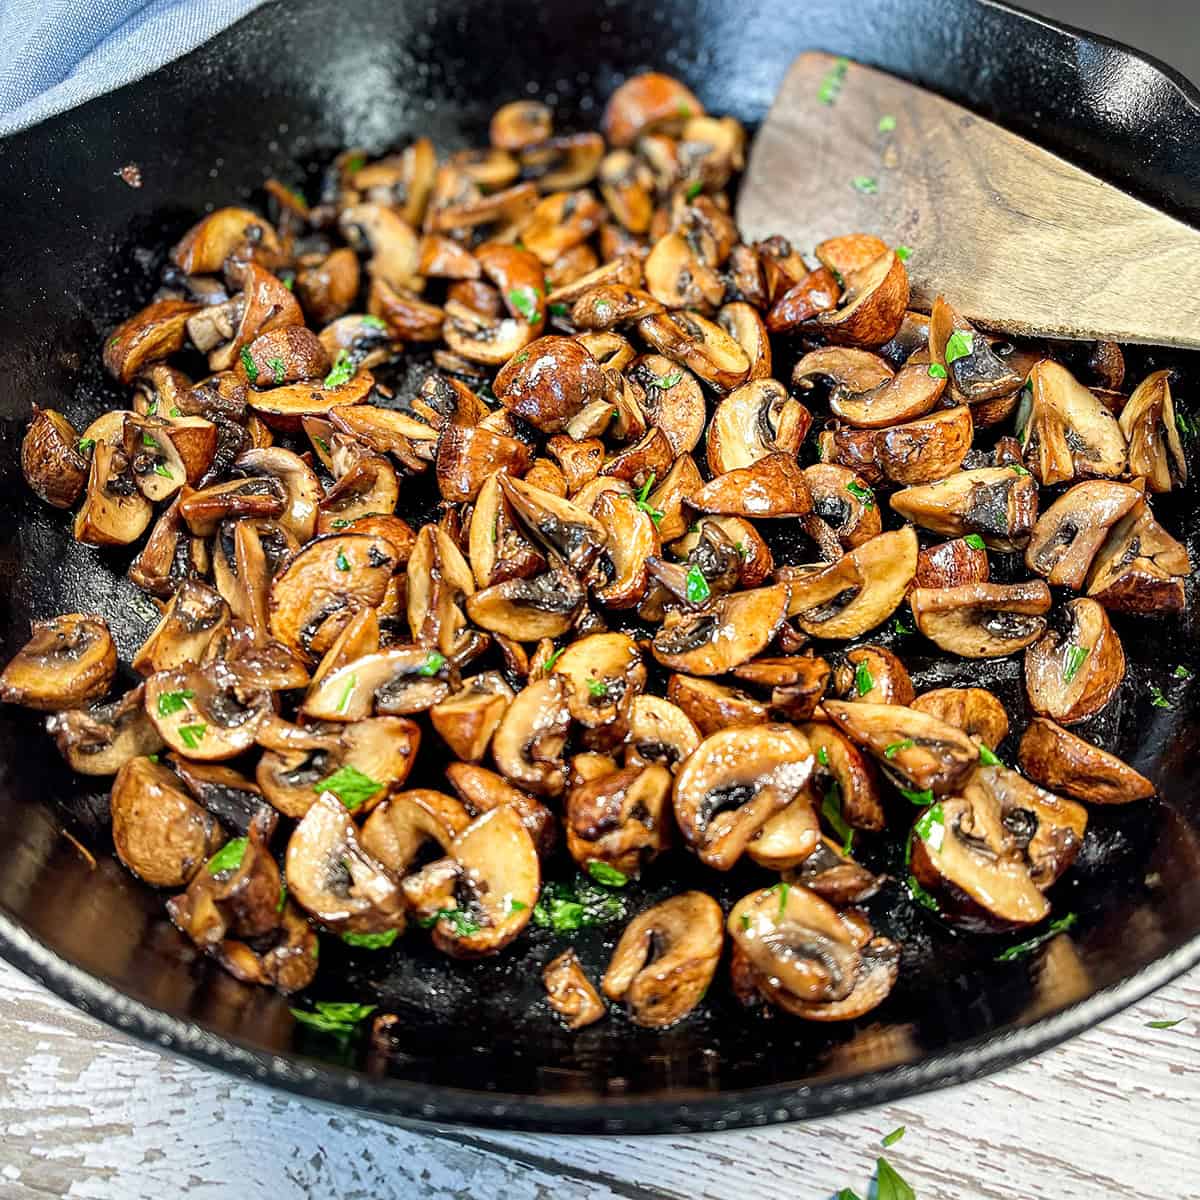
Once cleaned, the cutting technique matters more than one might expect. For uniform cooking, slice mushrooms to an even thickness, roughly a quarter-inch thick. Thinner slices will cook faster and crisp up nicely, while thicker cuts retain more chew and juiciness. Some chefs prefer to leave small mushrooms whole, which can create a beautiful presentation. Regardless of the shape, consistency in size ensures each piece cooks at the same rate, preventing some from burning while others remain underdone.
The choice of cooking fat also plays a significant role in the final outcome. Butter adds a rich, nutty flavor that pairs beautifully with mushrooms, but it can burn at high temperatures. Olive oil offers a fruity note and a higher smoke point, while avocado oil or clarified butter provide even more heat tolerance. Many professional cooks recommend using a combination of oil and butter to get the best of both worlds. The oil raises the smoke point, allowing the butter to contribute its distinctive flavor without scorching.
Heating the pan properly is perhaps the most crucial step in the entire process. A heavy-bottomed skillet, such as cast iron or stainless steel, distributes heat evenly and retains it well. Place the pan over medium-high heat and allow it to warm up for a minute or two before adding the fat. The oil should shimmer but not smoke, indicating that the pan is hot enough to sear the mushrooms on contact. Adding mushrooms to a pan that is not sufficiently hot will cause them to steam rather than sauté, leading to a gray, soggy texture.

When the mushrooms hit the hot pan, it is important not to overcrowd them. Overcrowding lowers the pan’s temperature and traps steam, which prevents browning. If necessary, cook the mushrooms in batches to maintain a single layer with a little space between each piece. This allows moisture to evaporate quickly and encourages caramelization. At first, the mushrooms will release their liquid and appear to be boiling in their own juices. Patience is required here, as this moisture must cook off before browning can begin.
Resist the urge to stir the mushrooms constantly. Instead, let them sit undisturbed for two to three minutes after they are added to the pan. This allows a golden-brown crust to form on the bottom side. Once that crust develops, give the pan a good shake or use a spatula to flip the mushrooms over. Continue cooking, stirring occasionally, until all sides are nicely browned and the mushrooms have reduced in size significantly. The entire process typically takes about eight to twelve minutes, depending on the quantity and pan temperature.
Seasoning is best done at the right moment to avoid drawing out excess moisture too early. Salt draws water out of mushrooms, so adding it at the beginning can delay browning. Instead, wait until the mushrooms have released their liquid and started to brown before sprinkling with salt. Freshly ground black pepper, garlic powder, or thyme can be added at this stage to build layers of flavor. For an extra depth, a splash of soy sauce or Worcestershire sauce near the end of cooking adds umami without making the dish taste salty.
Deglazing the pan after sautéing is a technique that captures all the flavorful browned bits stuck to the bottom. A splash of dry white wine, chicken broth, or even balsamic vinegar can be poured into the hot pan and stirred to lift those savory particles. This creates a simple pan sauce that can be drizzled over the mushrooms or used as a base for gravies and stews. Allow the liquid to reduce by half, scraping the pan constantly, until it thickens slightly and coats the mushrooms beautifully.
Once the mushrooms are perfectly sautéed, they can be served immediately or incorporated into a wide range of dishes. They make an excellent topping for grilled steaks, a savory addition to creamy pastas, or a hearty filling for omelets and quesadillas. Sautéed mushrooms also shine in grain bowls, atop polenta, or as a side dish alongside roasted chicken or fish. For those who meal prep, they store well in the refrigerator for up to four days and can be reheated gently in a skillet or microwave.
Beyond their culinary versatility, mushrooms offer impressive nutritional benefits. They are low in calories and fat while providing essential nutrients such as B vitamins, selenium, and potassium. Mushrooms are also one of the few non-animal sources of vitamin D, especially when exposed to ultraviolet light during growth. Including them in a balanced diet supports immune function, heart health, and overall wellness. Their savory, umami-rich flavor also makes them a satisfying substitute for meat in vegetarian and vegan recipes.
Common mistakes can easily be avoided with a little attention to detail. Using too much oil, overcrowding the pan, or stirring too often are the primary culprits behind subpar sautéed mushrooms. Another frequent error is adding onions or garlic too early, as they can burn before the mushrooms are fully cooked. For the best results, sauté mushrooms on their own first, then remove them and cook aromatics separately before combining. This method ensures each component achieves its optimal texture and flavor.
For those who enjoy experimenting, sautéed mushrooms can take on global flavors with simple spice adjustments. A pinch of smoked paprika or cumin adds warmth, while fresh herbs like rosemary or sage bring an aromatic quality. Asian-inspired versions benefit from a drizzle of sesame oil and a sprinkle of ginger or chili flakes. The basic technique remains the same regardless of the flavor profile, making it a versatile skill to have in any home cook’s repertoire.
In conclusion, sautéing mushrooms is a fundamental cooking technique that rewards attention to detail with exceptional flavor and texture. By selecting fresh mushrooms, cleaning them properly, and using high heat with the right fat, anyone can achieve golden, savory results. Avoiding overcrowding, seasoning at the right time, and allowing for proper browning are the keys to success. Whether served as a simple side dish or as part of a more elaborate meal, perfectly sautéed mushrooms are sure to impress. With practice, this easy method will become a go-to skill for delicious, restaurant-quality cooking at home.